
This article is intended for documentary filmmakers who, for reasons of access or budget, work alone, or nearly so. Hiring a professional sound person is essential in many situations, but too often the presence of an indifferent technician is a liability. Non-technical filmmakers can master enough of the basics to get adequate sound. I've chosen the Sennheiser G3 to explain the steps in setting up a wireless system because it is the most common system in use at this level.
Why not use the fully automatic units that are coming out, like the Sennheiser AVX? The AVX has a couple of fatal flaws for serious documentary work. It introduces a 19-millisecond latency, which means it will create an echo when paired with an analog source such as a camera or boom microphone. Also, it uses two $50 proprietary rechargeable batteries, and the receiver battery lasts maybe five hours.
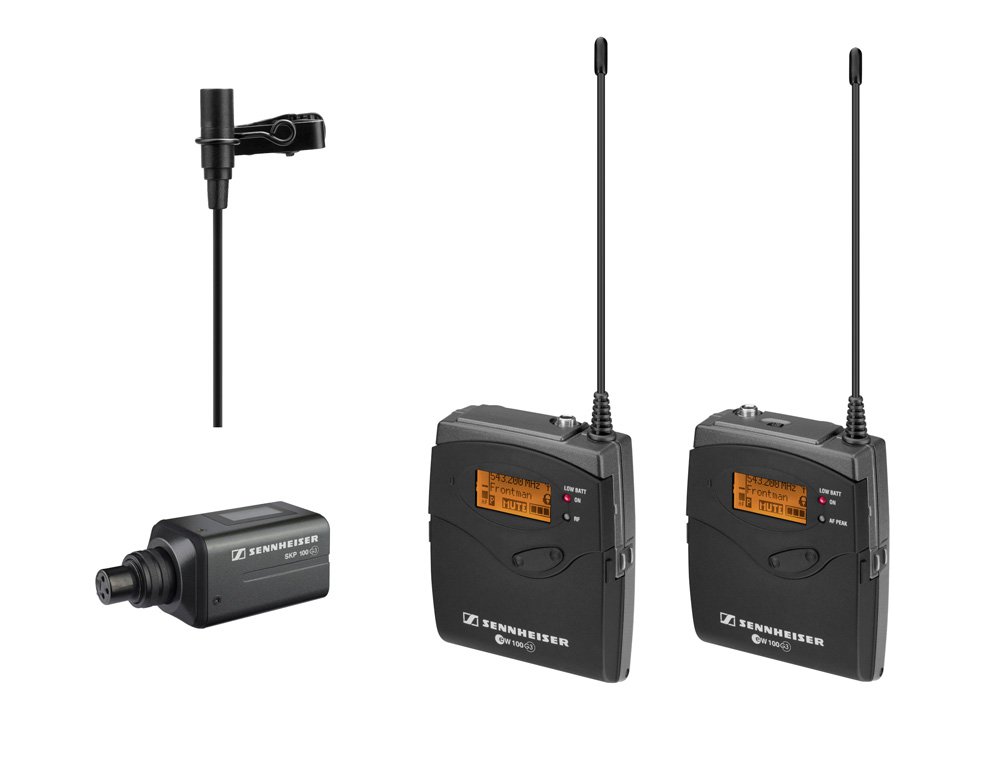
The Sennheiser ew100 Evolution G3 Wireless System
The cool dude with '80s-style tousled hair and bush jacket on the cover of the manual for the G3 wireless system is not wearing headphones, earbuds or any sound-monitoring device. Cool dude, maybe; crap sound, probably. You must monitor your sound, wireless or wired. This manual also gives almost no information on setting levels—the key to getting good wireless sound.
Being Ready
Use fresh batteries every day. The most common cause of lost wireless sound is a dead battery. I suggest using rechargeable batteries that have been charged the night before. Carry two sets per day. Have at least one extra of every cable. The question is not whether your cables will fail; it's when.
Setting Up
The following steps must be done in order, for best sound quality. This is where most mistakes are made.
When you arrive at location, turn the EK 100 G3 receiver on with the transmitter off. There are two columns on the left of the display designated "RF" and "AF." The RF column indicates the level of the radio signal level. The AF column indicates the level of the audio signal. If you see activity in these columns with your transmitter off, there is a conflicting signal on your frequency.
Turn the SK 100 transmitter on. If the frequencies are synchronized, the RF column on the receiver display will show a full signal.
Mount the microphone on your subject. This can be done in many different ways—hidden, not hidden, using the clip, using moleskin, etc. You will find many suggestions online.
Press the "Set" button to enter the menu, then scroll down to "Sensitivity," using the arrow buttons. Press Set again to enter. Carry on whatever small talk allows you to see the subject's volume levels on the transmitter. Increase the sensitivity with the arrow buttons until the AF Peak light begins to flash. Back the sensitivity off until the flashing stops, then back it off a little more; most people will speak more loudly once the ruckus starts. It's liable to be around -30. The higher you can set the sensitivity without seeing the peak light, the cleaner your sound will be. But if the peak light flashes, you have distortion. Press Set. The display will read "Stored." If you forget to press Set, the sensitivity will revert to what it was before you started. Use the On/Off button to exit menus. You will find that most people have similar levels. Note that sensitivity settings are negative numbers; -27 is more sensitive than -30.
Set the audio gain of the recording device—most likely a camera in this example. This is where it gets controversial. Professionals will rightly advise setting the audio input to Line Level. In practice, this does not work well with the G3. Set the camera input to Mic Level, Manual Gain, Limiter and Wind Off. The last two will be menu items. Do not use Mic + 48V, otherwise known as Phantom Power. I can tell you from experience that it will damage some receivers. Set the camera gain to the middle of its range, usually 5. This setting will deliver the best audio quality and give you room to adjust the levels, if need be.
Set the Receiver Output Level. Press Set to enter the menu, scroll to "AF Out," press Set again, then adjust the output with the arrow buttons so peaks at the camera average around -12dB. The levels may seem a bit low on the camera and in your editing system, but -12 is the professional standard. You never want to see an audio peak that reaches the top of the scale, except for extraordinary events like gunshots. Press Set, see Stored, be happy. The Limiter function of your camera may be turned back on now if sound levels are highly variable. As the situation changes, minor adjustments can be made at the camera, but if the camera gain has to be set below 3 or above 7 on a scale of 10, make an adjustment to the AF Out level.
The Principle
In this order: First, optimize the transmitter sensitivity for the subject's level. Second, optimize the receiver output for the recording device with its gain set in the middle of its range.
Frequency Conflicts
If you saw activity in the RF or AF columns when you turned your receiver on with the transmitter off, you have a frequency conflict. To complicate things, even if you saw no interference in the morning, there may be intermittent signals on your frequency during the day. These often occur during business hours. If you start having dropouts at distances of less than 50 feet, a frequency change may help.
Changing the Frequency
Frequency changes are done at the receiver. Press the Set button and arrow down to "Easy Setup." Press Set to enter. Scroll to "Scan New List"; press Set again. The receiver will scan all frequencies in its range. Available frequencies are divided into 20 banks of 12 channels each. If you use multiple G3 systems in the same frequency range, they must tuned the same bank in order to avoid a form of interference called intermodulation—with the exception of bank "U," which you should avoid. After scanning, the receiver will display a bank that has the largest number of available frequencies, maximum 12. Press Set to choose that bank. The display will then show the first available channel in that bank. Press Set to choose the channel. Use the On/Off button to exit Easy Setup.
Open the doors to both the receiver and the transmitter. Turn both units on. Press Set to enter the main menu of the receiver, scroll down to "Sync," press Set. An arrow pointing right will appear on the receiver display. Hold the units display to display a few inches apart. An infrared signal from the receiver will reprogram the transmitter to the receiver's frequency. A check mark will appear on the receiver display indicating that the transmitter is synchronized. The RF column on the receiver display will now show Full. If you are shooting in a media scrum or other event where multiple wireless mics will be in use, get there early, find a clean channel and leave your transmitter on, even if you won't shoot right away. This will lessen the chance of someone else landing on your channel.
Trolls and Ethics
When using a wireless device, you may not be the only one listening. Anyone nearby with a similar receiver may be able to tune in. Comtek transmissions are especially vulnerable to eavesdropping because receivers are cheap on eBay and they don't have many frequencies to search. Some filmmakers feel it's fair game to record or listen in on subjects when they think they have privacy or have forgotten they are wired. This is illegal in most states, and always unethical. The equipment I use has to be turned off at the transmitter, and I tell my subjects how to do it. This backfired on me once during a shoot involving a famous photographer who was exceptionally abusive to her assistants. These poor wretches would be led off the set and harangued in the most vicious ways. Each time this happened, which was often, she would turn the transmitter off, then neglect to turn it back on.
Considerations
The Internet is a vast repository of self-appointed experts and inaccurate and outdated information. Otherwise reputable sources, dealers even, put out some real whoppers along with honest omissions. I have done my best here, but I'm sure there are many who will take issue. Finally, I encourage filmmakers to make films, not obsess over specifications and YouTube reviews. It's the content, not the codec.
Alan Barker currently teaches and works in documentary sound, primarily with his partner, Joan Churchill.